Blog

  • Turn off these phone settings before traveling abroad

    Turn off these phone settings before traveling abroad

    Your phone does not need to be in your hand to use mobile data.

    While it sits in your pocket, it can refresh apps, upload photographs, download updates, retrieve emails and switch from weak hotel Wi-Fi to a cellular network.

    At home, that background activity may be harmless. Abroad, particularly without an inclusive roaming package, the same activity can become expensive.

    The obvious solution appears to be switching off data roaming. But modern travel setups are more complicated. A traveler using a local SIM or travel eSIM may need roaming enabled for the new line while keeping it disabled for the home line.

    The safest strategy is not to switch off everything.

    It is to decide which SIM is allowed to use data, reduce background consumption and remove the settings that can silently override your choice.

    First, find out what your mobile plan actually covers

    Before changing the phone, check your carrier’s roaming tariff.

    Confirm:

    • which countries are included
    • how much high-speed data is available
    • whether calls and SMS are covered
    • whether a daily roaming pass activates automatically
    • what happens after the allowance is exhausted
    • whether tethering or hotspot use is permitted
    • whether incoming calls are charged
    • whether cruise ships and aircraft networks are excluded

    Do not assume that traveling within Europe automatically means free roaming.

    The European Union’s “Roam Like at Home” framework lets customers with qualifying EU and European Economic Area mobile subscriptions use domestic allowances while temporarily traveling in participating countries, subject to fair-use conditions. Since January 1, 2026, the arrangement has also extended to Ukraine and Moldova. That does not mean every SIM issued elsewhere, including by a non-EU operator, receives the same treatment.

    Your phone settings cannot protect you from a tariff you have not understood.

    1. Turn off data roaming on the SIM you do not intend to use

    Data roaming allows a SIM to connect to cellular data when it is outside its home carrier’s network.

    On an iPhone, Apple places the setting under:

    Settings → Cellular/Mobile Data → select the SIM → Data Roaming

    On a Pixel and many other Android phones, the route is generally:

    Settings → Network & internet → SIMs → select the SIM → Roaming

    Menu names vary between Android manufacturers and software versions. Apple advises travelers without an applicable roaming arrangement to turn off Data Roaming to help prevent roaming charges.

    For a traveler using only the home SIM, the decision is relatively simple:

    • turn roaming on when the carrier confirms that the destination and usage are covered
    • leave it off when there is no suitable roaming package

    With dual SIM or eSIM, each line must be checked separately.

    2. Select the correct SIM for mobile data

    Suppose your phone contains:

    • your normal home SIM for calls and verification messages, and
    • a travel eSIM for mobile internet

    Installing the travel eSIM is not enough. You must also select it as the line used for cellular data.

    On iPhone:

    Settings → Cellular/Mobile Data → Cellular Data → select travel eSIM

    On Android:

    Settings → Network & internet → SIMs → Mobile data → select travel eSIM

    The precise Android path varies by manufacturer.

    Then review the roaming setting for each line:

    SIMMobile dataData roaming
    Home SIMOffOff unless covered
    Travel eSIMOnAccording to eSIM provider’s instructions

    The final column is important. Many international eSIMs connect through partner networks and require data roaming to be enabled on the travel line. Turning roaming off globally can therefore prevent the eSIM from working.

    The correct rule is not “roaming must always be off.”

    It is:

    Roaming should be enabled only on the line and plan that you have deliberately chosen.

    3. Turn off automatic cellular-data switching

    Dual-SIM phones can include a setting that allows the device to switch mobile-data lines when the preferred line has poor service.

    That can be convenient at home. Abroad, it can undermine the entire travel setup.

    On iPhone, review:

    Settings → Cellular/Mobile Data → Cellular Data

    Then disable:

    Allow Cellular Data Switching

    The wording and availability depend on the phone, carrier and SIM configuration.

    On Android, look for settings such as:

    Switch mobile data automatically
    Automatic data switching
    Use data during calls
    Backup calling

    Manufacturer wording varies.

    The risk is simple: your travel eSIM loses signal, and the phone quietly moves data traffic to the home SIM. If that home SIM does not have an appropriate roaming package, the fallback can trigger unwanted charges.

    After setup, open the mobile-data page again and verify that the travel line is visibly selected.

    4. Enable Low Data Mode or Data Saver

    The most useful travel setting may not be a complete cellular shutdown. It may be a system-wide instruction to reduce background use.

    On iPhone:

    Settings → Cellular → select line → Data Mode → Low Data Mode

    Depending on the network type and iPhone configuration, the menu can appear slightly differently.

    Apple states that Low Data Mode restricts background network use. It can pause automatic updates and background tasks while reducing the frequency of some app activity.

    On Pixel and many Android phones:

    Settings → Network & internet → Data Saver

    Google explains that Data Saver reduces mobile-data use by limiting how most apps send or receive background data. Apps currently being used can continue accessing data, while selected apps may be granted unrestricted access.

    This gives you a better balance:

    • maps and messaging can continue working
    • nonessential background activity is reduced
    • you do not need to disable every app individually

    Before departure, review any apps marked as exempt from Data Saver. A photo app, social network or cloud-storage service with unrestricted access can still consume substantial data.

    5. Turn off automatic app updates over mobile data

    An app update can range from a few megabytes to well over a gigabyte. Several updates beginning after you leave hotel Wi-Fi can consume a limited travel plan surprisingly quickly.

    On iPhone, downloaded apps are automatically updated by default. Apple lets users disable automatic app updates through:

    Settings → Apps → App Store → App Updates

    You can also review whether the App Store is permitted to use cellular data.

    On Android, open:

    Google Play Store → profile picture → Settings
    → Network preferences → Auto-update apps

    Select:

    Over Wi-Fi only

    or temporarily choose not to auto-update. Google documents these network preferences within the Play Store’s app-update settings.

    Update essential travel apps before leaving:

    • airline app
    • maps
    • messaging
    • banking and authentication apps
    • travel eSIM app
    • accommodation and transport apps

    Then restrict automatic updates during the journey.

    Do not begin a major operating-system update immediately before boarding. Complete important security updates at home, with stable Wi-Fi, power and enough time to resolve any problem.

    6. Stop photo and video backups from using roaming data

    Modern phone cameras generate large files. A short high-resolution video can consume more data than hours of text messaging.

    Apple’s iCloud Photos can automatically upload photographs and videos so they remain synchronized across devices. iPhone also offers a separate option for some models and carriers to perform device backups over cellular data.

    Before traveling, review:

    Settings → [your name] → iCloud → Photos

    and:

    Settings → [your name] → iCloud → iCloud Backup

    You do not necessarily need to disable iCloud Photos completely. Low Data Mode can reduce background activity, and cellular access can be restricted for selected services. Apple recommends power and Wi-Fi when resolving or completing large iCloud Photos synchronization tasks.

    In Google Photos, open:

    Google Photos → profile picture → Photos settings
    → Backup → Mobile data usage

    Review whether photos or videos may be backed up using mobile data. Google confirms that Photos can automatically save media to the user’s account when backup is enabled and provides mobile-data controls within the backup workflow.

    A practical travel setup is:

    • photographs: back up on trusted Wi-Fi
    • videos: Wi-Fi only
    • roaming backup: off
    • manual emergency backup: available when genuinely needed

    There is a trade-off. Disabling cloud backup reduces data use, but a lost or stolen phone could also mean losing photographs that were never uploaded. Connect to trusted Wi-Fi periodically and allow the backup to complete.

    7. Restrict Background App Refresh

    Apps can retrieve new content even when they are not visibly open.

    On iPhone:

    Settings → General → Background App Refresh

    You can:

    • disable it completely
    • permit it over Wi-Fi only
    • control it app by app

    Apple documents the choice between Wi-Fi-only and Wi-Fi plus cellular background refreshing.

    A measured approach is better than disabling every service. Keep background access for apps that genuinely need timely updates, such as secure messaging or transportation, and restrict:

    • social-media apps
    • news apps
    • shopping platforms
    • games
    • cloud-storage tools
    • apps you will not use during the trip

    Android handles background access through Data Saver and individual app-data controls. The path differs across manufacturers, but it is generally available under:

    Settings → Apps → select app → Mobile data/Data usage

    Look for permissions such as:

    Background data
    Unrestricted data usage
    Allow data while Data Saver is on

    The objective is not to stop the phone from functioning. It is to prevent low-priority apps from consuming the travel allowance without your knowledge.

    8. Turn off Wi-Fi Assist or automatic mobile fallback

    Weak Wi-Fi is not always disconnected Wi-Fi.

    Your phone may remain connected to a hotel, airport or café network while deciding that the signal is too poor. It can then use cellular data to maintain the internet connection.

    On iPhone, this feature is called Wi-Fi Assist and is enabled by default. Apple explains that it can automatically switch to cellular data when the Wi-Fi connection is poor. It can be disabled under:

    Settings → Cellular/Mobile Data → Wi-Fi Assist

    On Android, manufacturers use names such as:

    Switch to mobile data automatically
    Intelligent Wi-Fi
    Adaptive connectivity
    Auto network switch

    Not every similarly named setting performs exactly the same function, so read the description shown on the device.

    This setting matters when you believe you are using free Wi-Fi while the phone is quietly supplementing it with roaming data.

    After connecting to public Wi-Fi, verify the active network icon instead of assuming the connection is carrying all traffic.

    9. Download essential content before departure

    Reducing background use is only half the plan. The other half is preparing the phone to work offline.

    Before leaving, download:

    • offline maps for the destination
    • airline boarding passes
    • hotel confirmation and address
    • train and bus tickets
    • travel-insurance details
    • passport and document copies stored securely
    • translation language packs
    • entertainment for the journey
    • emergency telephone numbers

    Save critical details in a form that does not depend on an email account refreshing correctly.

    A useful offline note should contain:

    Accommodation name and address
    Booking number
    Check-in instructions
    Flight or train details
    Travel insurer contact
    Card issuer emergency number
    Travel eSIM instructions
    Local emergency number

    Do not store unprotected card numbers, PINs or full identity-document details in an ordinary notes app.

    10. Do not turn off the wrong settings

    Some popular travel advice goes too far.

    Do not disable Find My or device-location security

    A lost phone abroad creates a larger problem than moderate data use. Keep device-finding and remote-lock features available.

    Do not assume GPS itself creates roaming charges

    Satellite positioning does not inherently require a mobile-data connection. However, map tiles, traffic information, search results and routing updates can use data. Downloading offline maps addresses the expensive part without disabling location services entirely.

    Do not disable security and authentication tools

    Banking verification, password managers and authenticator apps may be essential while traveling. Test them before departure, particularly if they depend on the home telephone number.

    Do not remove the home SIM without understanding the consequences

    You may need it to receive bank messages or account-verification codes. Keeping it active for SMS while disabling its data access may be more practical than removing it.

    Incoming SMS pricing and availability depend on the carrier and destination, so verify the tariff in advance.

    The Fintayo dual-SIM setup

    For a traveler using a data-only eSIM, a sensible configuration may look like this:

    SettingHome SIMTravel eSIM
    Line enabledYesYes
    Calls and SMSHome lineUsually unavailable/data only
    Mobile dataNoYes
    Data roamingOffAs instructed by provider
    Automatic data switchingOffOff
    Low Data Mode/Data SaverOn

    This arrangement keeps the home number available while directing internet traffic through the travel plan.

    However, phone models, carriers and travel eSIM products differ. Always follow the eSIM provider’s activation instructions, particularly regarding roaming and the access-point name, or APN.

    A five-minute preflight phone audit

    Complete this before leaving home Wi-Fi:

    1. Confirm the roaming tariff or activate the intended package.
    2. Install and test the travel eSIM.
    3. Select the correct mobile-data line.
    4. Turn off data roaming for the home SIM when it is not covered.
    5. Disable automatic cellular-data switching.
    6. Enable Low Data Mode or Data Saver.
    7. Restrict app updates to Wi-Fi.
    8. Restrict photo, video and cloud backups to Wi-Fi.
    9. Disable Wi-Fi Assist or similar cellular fallback.
    10. Download maps, bookings and essential travel documents.
    11. Reset the mobile-data statistics or note the current usage.
    12. Take screenshots of the final SIM configuration.

    Resetting the usage counter before departure gives you a simple way to see how much data the trip has consumed, although the carrier’s own records remain the basis for billing.

    Check the carrier app each day when using a capped or pay-as-you-go roaming package.

    The Fintayo takeaway

    Unexpected roaming bills rarely come from one dramatic action.

    They are often created by ordinary background activity:

    • a cloud photo upload
    • several app updates
    • a weak Wi-Fi connection
    • an automatic switch to the wrong SIM
    • a video that begins playing at full quality

    The best defense is not permanently disabling the smartphone.

    It is giving each connection a clear job:

    The home SIM keeps your number. The travel SIM carries the data. Background apps wait for Wi-Fi.

    Once that setup is correct, your phone can remain useful without being allowed to make expensive network decisions on its own.

    Important: Settings, menu names, roaming tariffs and eSIM requirements vary by phone, operating system, carrier and destination. Verify your provider’s current instructions before traveling.


  • Never choose this ATM option abroad: The currency conversion trap

    Never choose this ATM option abroad: The currency conversion trap

    You are standing at an ATM in another country, trying to withdraw cash before a taxi arrives.

    The machine offers two choices:

    Withdraw 20,000 HUF with conversion

    or

    Continue without conversion

    One option displays the exact amount that will be charged in your home currency. The other leaves the final conversion to your card issuer.

    The first option looks safer. It gives you a familiar number, promises a “guaranteed exchange rate” and may even warn that choosing the other button means the rate is unknown.

    That convenience has a name: dynamic currency conversion, or DCC.

    And it can make an ordinary cash withdrawal significantly more expensive.

    Visa describes DCC as a service that lets a merchant or ATM convert a foreign transaction into the cardholder’s home currency at the point of payment. When it is offered, the screen should show the amount in both currencies, the exchange rate and any additional markup or fees.

    The important question is not whether the ATM can perform the conversion.

    It is who gets to choose the exchange rate.

    What happens when you accept the ATM’s conversion

    When you withdraw money abroad, the ATM normally dispenses the local currency.

    If you choose to continue in that local currency, the transaction is sent through the card network and converted according to the arrangements between the card network and your bank. Your card issuer may still charge a foreign-exchange fee, an overseas cash-withdrawal fee or both.

    If you accept DCC, the ATM operator or its conversion provider performs the currency conversion immediately. Mastercard explains that when a retailer or ATM operator converts the transaction, Mastercard’s currency-conversion rate does not apply. This commonly happens when the cardholder chooses to be charged in the currency of the card rather than the local currency of the ATM.

    In practical terms:

    • Local currency: your bank or card network handles the conversion.
    • Home currency: the ATM’s DCC provider handles the conversion.

    The second option gives the ATM operator control over the rate presented to you.

    The Fintayo example: how a small rate difference becomes a real cost

    Consider a traveler with a euro-denominated card withdrawing Polish złoty.

    This is an illustrative example, not a current market quote.

    Withdrawal calculationWithout ATM conversionWith ATM conversion
    Cash receivedPLN 1,000PLN 1,000
    Exchange rate usedPLN 4.25 per €1PLN 4.00 per €1
    Converted amount€235.29€250.00
    Difference€14.71 more

    Both transactions produce exactly the same PLN 1,000 in cash.

    But the DCC option charges €250 instead of €235.29. That is €14.71 more before considering any separate ATM or bank fees.

    Expressed against the lower converted amount, the difference is approximately 6.25%.

    The ATM does not need to display a separate line saying “you are paying €14.71 extra.” The cost can be embedded in the exchange rate itself.

    That is why a screen showing “0% commission” does not automatically mean that the conversion is inexpensive. A provider can advertise no separate commission while still using an unfavourable exchange rate.

    The ATM may charge you in three different ways

    Travelers often treat every extra cost as a single “ATM fee,” but three separate price layers can exist.

    1. ATM operator fee

    This is the charge imposed by the company or bank that owns the cash machine.

    It may appear as:

    This ATM will charge a fee of €4.95

    That fee can exist whether you accept or decline currency conversion.

    2. Dynamic currency conversion markup

    This is the difference created by the exchange rate offered by the ATM’s DCC provider.

    It may be displayed as a percentage markup, incorporated into the quoted rate or presented through a total amount in your home currency.

    3. Your card issuer’s charges

    Your own bank may impose an overseas cash-withdrawal fee, a foreign-currency transaction charge or both. Mastercard’s currency calculator notes that a card issuer may apply additional charges and may not necessarily use Mastercard’s indicated rate when billing the customer.

    Declining DCC therefore does not guarantee a fee-free withdrawal.

    It simply prevents the ATM operator from performing the currency conversion for you.

    Which button should you press?

    For most travelers, the practical rule is:

    Choose the local currency and decline the ATM’s conversion.

    That may appear on the screen as:

    ATM wordingWhat it usually means
    Withdraw in local currencyDecline DCC
    Continue without conversionDecline DCC
    Charge in PLN, HUF, CZK, USD or local currencyDecline DCC
    Accept conversionUse DCC
    Charge in your home currencyUse DCC
    Guaranteed exchange rateUsually DCC
    Know the exact amount nowUsually DCC

    The wording is not standardized across every country or ATM network.

    Some machines use a red button for declining conversion and a green button for accepting it. Others make the DCC option larger, place it first or display warnings beside the local-currency choice.

    Do not make the decision based on the button’s color.

    Look at the currency code.

    When withdrawing cash in Poland, the local currency is PLN. In Hungary, it is HUF. In Croatia, France, Germany, Italy and other euro-area destinations, it is EUR.

    The currency dispensed by the ATM is generally the currency you want the machine to charge.

    “Without conversion” does not mean the transaction will not be converted

    This is one of the most confusing parts of the ATM screen.

    When you select “without conversion,” the transaction may still need to be converted into the currency of your card account.

    The phrase means:

    The ATM will not perform the conversion.

    Your bank or card network may perform it later instead.

    Visa and Mastercard both provide tools that can give cardholders an indication of the network conversion rate. The final amount can still vary because of timing, issuer pricing and additional fees.

    So the choice is not:

    • conversion, or
    • no conversion

    The real choice is:

    • conversion by the ATM provider, or
    • conversion through your card arrangement

    Can DCC ever be cheaper?

    It is theoretically possible for a displayed DCC rate to be competitive with the complete cost charged by a particular bank.

    For example, a card issuer may impose unusually high foreign-currency or overseas withdrawal fees. A traveler may also value knowing the exact home-currency amount immediately.

    But that does not make DCC automatically better.

    A valid comparison would require checking:

    1. the ATM’s exchange rate and markup
    2. the operator’s separate withdrawal fee
    3. your bank’s network conversion method
    4. your bank’s foreign-currency charge
    5. your bank’s cash-withdrawal fee

    Most travelers do not have all five figures available while standing at an ATM.

    That is why choosing the local currency is usually the more defensible default. Mastercard’s consumer guidance likewise advises cardholders to decline the conversion option and allow their own bank to perform the currency conversion.

    The word usually matters. The final cost depends on the card and account being used.

    European ATMs must provide more transparency

    Within the European Union, rules on cross-border payments require greater transparency when currency-conversion services are offered at an ATM or point of sale.

    Providers offering DCC for covered transactions must present the currency-conversion charge as a percentage markup over the latest available European Central Bank reference exchange rate. The information must be shown before the customer authorizes the transaction.

    This allows a traveler to see information such as:

    Markup over ECB rate: 8.4%

    That percentage is more useful than a vague statement such as “guaranteed rate.”

    But transparency does not mean the offer is inexpensive.

    It only means the additional cost should be easier to identify.

    A clearly disclosed 9% markup is still a 9% markup.

    A better ATM routine abroad

    The best time to understand your travel-card costs is before you reach the airport.

    Open your bank’s price list or mobile app and check:

    • foreign-currency card transaction fee
    • overseas ATM withdrawal fee
    • minimum cash-withdrawal charge
    • daily withdrawal limit
    • whether certain ATM networks are cheaper
    • whether your account refunds operator fees
    • whether your card uses Visa, Mastercard or another conversion arrangement

    At the ATM:

    1. Confirm that the machine belongs to a recognizable bank or established network.
    2. Check the local withdrawal fee before proceeding.
    3. Select the amount in local currency.
    4. Decline conversion into your home currency.
    5. Read the final confirmation screen before entering your PIN or confirming.
    6. Keep or photograph the receipt.
    7. Review the transaction in your banking app.

    Cancel the withdrawal if the operator fee is excessive. Trying another ATM can be cheaper, particularly when the machine is located inside or beside a bank branch.

    One large withdrawal or several smaller ones?

    Suppose an ATM charges a fixed €5 operator fee per withdrawal.

    Three withdrawals result in €15 of operator fees. One larger withdrawal results in €5.

    From a fee perspective, fewer withdrawals can be cheaper.

    But withdrawing a large amount creates other risks:

    • carrying more cash
    • theft or loss
    • local ATM limits
    • your bank’s daily limit
    • the possibility of the machine failing to dispense the correct amount

    The optimal withdrawal is not necessarily the maximum available. It is an amount that balances fixed fees against the security risk of carrying cash.

    Also avoid withdrawing more money solely because the ATM suggests a large preset amount. Preset buttons are convenient for the operator, not necessarily for your travel budget.

    What if you accepted DCC by mistake?

    Once the ATM transaction has been completed and the cash has been dispensed, reversing it may be difficult.

    Keep the receipt and take screenshots from your banking app. The receipt should ideally show:

    • the amount of local currency withdrawn
    • the amount charged in your home currency
    • the exchange rate
    • any DCC markup
    • the ATM fee
    • the ATM operator

    Contact your card issuer if:

    • the ATM did not clearly offer a choice
    • conversion was applied after you selected local currency
    • the displayed rate or amount differs from the final charge
    • the machine dispensed no cash or the wrong amount
    • you suspect an unauthorized or duplicated transaction

    Visa requires participating merchants and ATMs offering DCC to disclose the local and home-currency amounts, currency symbols, exchange rate and relevant markup or fees.

    A poor exchange rate that was properly shown and accepted is not necessarily treated the same as an unauthorized conversion. The available dispute route depends on the facts, the card scheme’s rules and your issuer’s assessment.

    The Fintayo three-second rule

    When an ATM abroad asks how you want to be charged, ignore the emotional wording and ask three questions:

    What currency will I receive?
    That is normally the local currency.

    What currency is the ATM offering to charge?
    If it is your home currency, that is likely DCC.

    Who do I want setting the rate?
    Unless you have verified that the ATM offer is genuinely better, choose the local currency and let your card arrangement handle the conversion.

    The decision takes three seconds once you know what to look for.

    The Fintayo takeaway

    The currency-conversion trap works because certainty feels valuable.

    The ATM shows an exact home-currency amount. It may promise a guaranteed rate and warn that the alternative is unknown.

    But the familiar amount does not tell you whether the rate is competitive.

    When withdrawing cash abroad:

    • select the local currency
    • decline the ATM’s conversion
    • check the operator fee separately
    • understand your own bank’s charges
    • compare the complete cost, not a single screen message

    The safest default is not “accept the rate so there are no surprises.”

    It is:

    Take the local cash in the local currency.

    The ATM can dispense the money.

    It does not also need to choose your exchange rate.

    Important: Card pricing, ATM fees, exchange rates and conversion rules vary by issuer, country and operator. Check your card’s current tariff and the information displayed by the ATM before confirming a withdrawal.

  • The 24-hour flight price rule that can save you money after booking

    The 24-hour flight price rule that can save you money after booking

    The most frustrating airfare drop is not the one you miss before booking. It is the one that appears immediately afterward.

    You buy a ticket for $520, receive the confirmation and stop searching. That evening, the same flight appears for $455.

    At first, the $65 difference looks lost. But when a booking is covered by the U.S. Department of Transportation’s 24-hour reservation requirement, there may still be enough time to cancel the original ticket and purchase the lower fare.

    This is not a price-match guarantee. It is a limited cancellation or reservation-hold protection, and several details determine whether it can actually help.

    What the 24-hour flight rule really provides

    For airline tickets purchased at least seven days before scheduled departure, an airline subject to the rule must provide one of two options:

    • allow the reservation to be cancelled within 24 hours for a full refund without a penalty; or
    • allow the reservation and quoted price to be held for 24 hours without requiring payment.

    The airline does not have to provide both options. Travelers therefore need to check the policy shown during the airline’s booking process rather than assume that every carrier follows an identical system.

    The rule also does not force an airline to modify an existing ticket for free. If the fare falls, the practical route may be to cancel the original reservation and create a new booking at the lower price. The DOT itself notes that refunding and rebooking can sometimes cost less than changing a ticket, while warning that airfares can change quickly.

    That distinction matters. You are not asking the airline to refund the price difference. You are using an eligible cancellation window and taking the risk of making a second purchase.

    The Fintayo calculation: when the saving is real

    Consider this hypothetical booking:

    Cost itemOriginal fareNew fare
    Base ticket and mandatory charges$520$455
    Checked baggageIncluded$40
    Seat selectionIncluded$18
    Real total$520$513

    The search result suggests a $65 saving.

    The real saving is only $7.

    That is why the headline fare is not enough. Airlines sell different fare classes with different restrictions, and cheaper products may exclude baggage, advance seat selection or other services. DOT guidance specifically advises travelers to compare ticket restrictions and optional-service costs before purchasing.

    A proper comparison should include:

    • the same airports and travel dates
    • the same flight numbers and connections
    • cabin and checked-baggage allowance
    • seat-selection costs
    • cancellation and change conditions
    • loyalty benefits
    • any payment or booking charges
    • the value of extras already purchased

    If the replacement ticket saves only a few dollars, the risk and administrative work may not be worthwhile.

    The safest order of operations

    The biggest mistake is cancelling the original ticket before fully examining the replacement.

    A safer process is:

    1. Open the original reservation and confirm the exact cancellation deadline.
    2. Search for the same itinerary in a separate browser tab.
    3. Compare the complete fare conditions, not only the displayed price.
    4. Confirm that enough seats remain for every traveler in the booking.
    5. Check whether baggage, seats and other purchased extras are refundable.
    6. Take a screenshot of the lower fare and the cancellation policy.
    7. Cancel through the airline’s official website or app.
    8. Immediately complete the replacement booking.
    9. Save the original confirmation, cancellation receipt and new confirmation.

    This process still carries risk. The lower fare can change or disappear between cancellation and payment, particularly when inventory is limited.

    For a family booking, a complicated itinerary or a small potential saving, contacting the airline first may be the more sensible decision.

    Direct airline booking and third-party booking are not the same

    The DOT’s 24-hour airline requirement does not apply to tickets booked through online travel agencies, traditional travel agents or other third-party sellers.

    Those companies may voluntarily offer a similar cancellation period, but they are not required to provide the airline protection described above. When a third party issued the ticket, the traveler should normally contact that seller before contacting the airline.

    This is one reason the cheapest listing is not always the best booking channel.

    A third-party platform might show a fare that is $8 lower, but direct airline booking may provide a clearer cancellation process, easier schedule-change support and fewer parties involved when something goes wrong.

    Before using an agency, check:

    • who will process a cancellation
    • whether its own 24-hour policy applies
    • whether it charges an administration fee
    • whether refunds return as cash or platform credit
    • whether the airline can manage the reservation directly

    The seller that charged the payment is often the first company you will need to deal with.

    A U.S. rule is not a worldwide right

    The 24-hour protection should not be treated as a universal rule for every flight purchased anywhere in the world.

    In the European Union, consumers generally have a 14-day cooling-off period for many online purchases. However, plane and train tickets for specific dates are expressly excluded from that general right of withdrawal. For these bookings, cancellation depends on the fare conditions, the airline’s voluntary policy and any other applicable rules.

    An airline may still independently offer a risk-free cancellation period. But the existence, duration and refund method must be confirmed for the specific ticket.

    This is particularly important when:

    • the booking is made outside the United States
    • the flight does not fall under the relevant U.S. protection
    • the seller is based in another jurisdiction
    • the ticket is part of a package
    • the fare is purchased through an intermediary

    The correct question is not simply, “Was this booked online?”

    It is, “Which rule and which seller’s conditions apply to this exact reservation?”

    Use the first 24 hours as a booking audit

    The strongest use of the rule may not be chasing a lower fare. It may be catching an expensive mistake.

    Immediately after receiving the confirmation, check:

    • passenger names
    • departure and arrival dates
    • origin and destination airports
    • connection lengths
    • operating airline
    • baggage allowance
    • passport details, where entered
    • seat assignments
    • total amount charged

    Airlines are not required to correct ticket details or move a passenger to a different date for free merely because the request is made within 24 hours. Cancelling and rebooking may therefore be the cleaner option when an eligible booking contains a serious error.

    Set a reminder well before the deadline. Do not plan to act in the final few minutes, when website errors, payment verification or customer-service queues can become decisive.

    When the trick is not worth using

    Do not cancel only because a search engine displays a smaller number.

    Keeping the original reservation may be safer when:

    • the lower fare has worse baggage conditions
    • paid seats or extras may be lost
    • the replacement price is not available for all passengers
    • the ticket was issued by an online travel agency
    • the original purchase used vouchers, credits or points
    • the itinerary contains partner airlines or multiple tickets
    • the saving is too small to justify the risk
    • the airline’s cancellation wording is unclear

    Also distinguish between a refund and a travel credit.

    A voucher that can only be used with the same airline is not equivalent to money returned to the original payment method. When a refund is legally owed under current DOT refund standards, airlines generally may not substitute a voucher unless the passenger affirmatively chooses that alternative.

    A realistic example

    You purchase a direct airline ticket for $430 on Monday afternoon. The flight departs in six weeks.

    On Monday evening, the same itinerary appears for $365.

    Before acting, you confirm that:

    • the booking was made directly with the airline
    • it was purchased more than seven days before departure
    • the airline provides penalty-free cancellation for the first 24 hours
    • the new fare includes the same cabin bag
    • the seat-selection difference is only $9
    • the lower price remains available

    The replacement total is $374, producing a real saving of $56.

    That may be worth the effort.

    Now change one detail: the new fare excludes a $45 checked bag and charges $18 for the seat you already selected.

    The replacement total becomes $428.

    The apparent $65 discount has become a $2 saving. Cancelling would make little sense.

    The Fintayo takeaway

    The 24-hour flight price rule is useful, but not because it guarantees the cheapest airfare.

    Its real value is that it may provide a short decision window after a qualifying booking. During that window, a traveler can verify the itinerary, correct a costly mistake through cancellation and rebooking, or take advantage of a genuinely lower total price.

    The rule is most useful when you:

    • book directly with the airline
    • purchase at least seven days before departure
    • understand whether the airline offers a hold or a cancellation option
    • compare the full replacement cost
    • act well before the deadline
    • keep written records of every step

    A lower price after booking is not automatically a loss.

    But before cancelling a confirmed seat, make sure the saving exists beyond the search-result headline.

    Important: Airline policies, fare conditions and consumer-protection rules may change. Confirm the conditions displayed for your exact booking before cancelling or purchasing another ticket.

  • Monthly budget template: Free guide to organize your money

    Monthly budget template: Free guide to organize your money

    A monthly budget template is one of the simplest tools you can use to take control of your finances. Instead of wondering where your money went at the end of each month, a budget template gives every dollar a purpose before you spend it.

    Whether you’re creating your first budget, trying to save more money or paying off debt, using a structured monthly budget template makes financial planning much easier.

    In this guide, you’ll learn how to build a monthly budget from scratch, what categories to include and how to customize a template for your own financial goals.

    Key takeaways

    • A monthly budget template organizes your income and expenses in one place.
    • It helps reduce overspending and improve savings.
    • Every budget should include income, fixed bills, variable expenses and savings.
    • Review your budget every month to stay on track.
    • A simple template is usually more effective than a complicated one.

    What is a monthly budget template?

    A monthly budget template is a worksheet that helps you plan how you’ll use your income each month.

    Instead of tracking expenses after they happen, the template encourages proactive planning by assigning money to different spending categories before the month begins.

    Think of it as a financial roadmap that tells every dollar where it should go.

    Why should you use one?

    Without a written budget, it’s easy to underestimate spending and overestimate how much money remains available.

    A budget template creates visibility and accountability.

    • Know exactly where your income goes.
    • Prepare for recurring bills.
    • Save consistently.
    • Reduce financial stress.
    • Reach financial goals faster.

    Pro tip

    Complete your monthly budget template before the new month starts—not after you’ve already begun spending.

    What should a monthly budget template include?

    Section Examples
    Income Salary, freelance work, bonuses
    Housing Rent, mortgage
    Utilities Electricity, water, internet
    Transportation Fuel, maintenance, public transit
    Groceries Food and household supplies
    Insurance Health, auto, home
    Savings Emergency fund, investing
    Debt Payments Loans and credit cards
    Entertainment Streaming, hobbies

    Step 1: Calculate your monthly income

    Begin by calculating your total take-home income.

    If you receive a regular salary, this step is straightforward.

    If your income varies, estimate a conservative monthly average based on the past six to twelve months.

    Step 2: List fixed expenses

    Fixed expenses usually remain the same every month.

    • Rent or mortgage
    • Insurance
    • Phone bill
    • Internet
    • Loan payments
    • Subscriptions

    These costs should always appear first in your budget.

    Step 3: Estimate variable expenses

    Variable expenses change from month to month.

    • Groceries
    • Fuel
    • Dining out
    • Entertainment
    • Shopping
    • Personal spending

    Review recent bank statements to estimate realistic amounts instead of guessing.

    Step 4: Schedule savings first

    One of the most effective budgeting habits is paying yourself first.

    Instead of saving whatever money remains at the end of the month, include savings as one of your first planned expenses.

    Priority Category
    1 Income
    2 Savings
    3 Housing
    4 Utilities
    5 Groceries
    6 Transportation
    7 Discretionary spending

    Automating savings immediately after payday makes it much easier to stay consistent throughout the year.

    Step 5: Build your monthly worksheet

    Once you’ve gathered all your numbers, organize them into one simple monthly worksheet.

    In the next section, we’ll create a complete printable monthly budget template, explain how to review it every month, discuss common mistakes and show you how to customize it for your financial goals.

    Step 6: Complete your monthly budget template

    Now it’s time to combine everything into one simple worksheet. The goal is to make your monthly finances easy to understand at a glance.

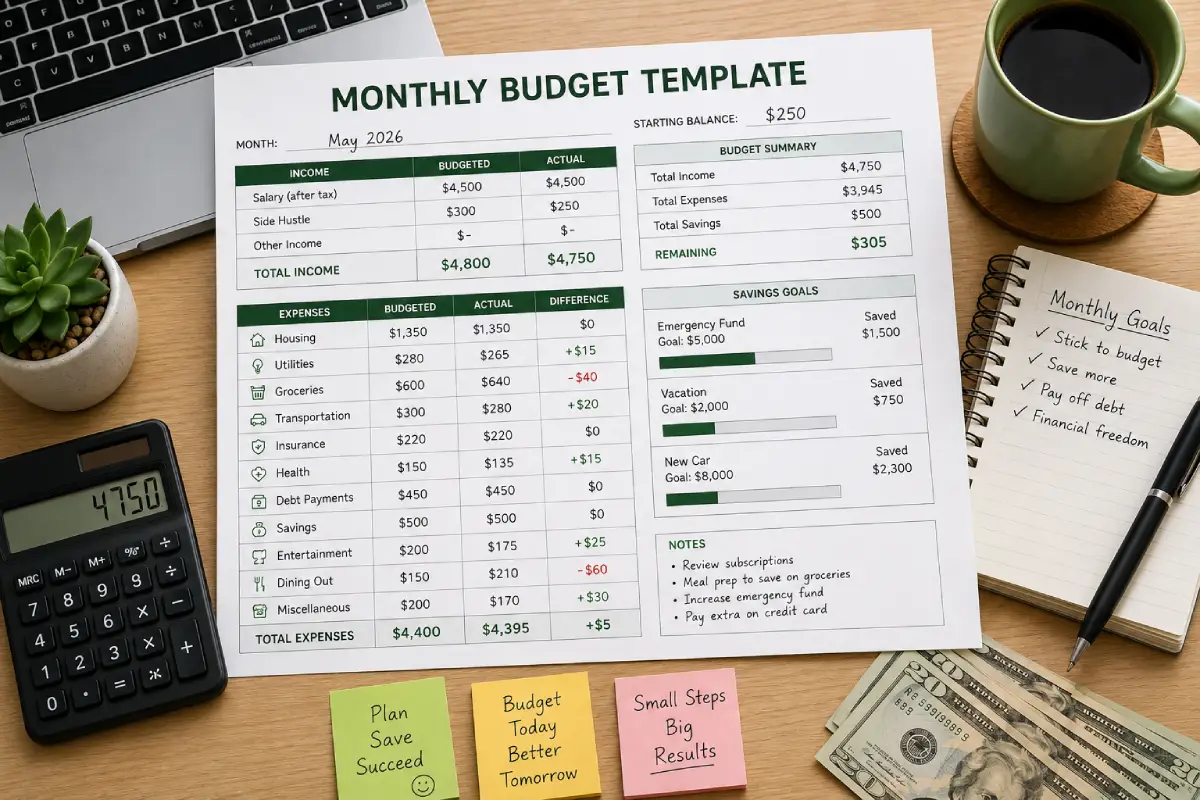
    A good template should show your expected income, planned expenses, actual spending and the difference between the two.

    Category Budgeted Actual Difference
    Income $4,500 $4,500 $0
    Housing $1,350 $1,350 $0
    Utilities $280 $265 +$15
    Groceries $600 $640 -$40
    Transportation $300 $280 +$20
    Insurance $220 $220 $0
    Savings $500 $500 $0
    Debt Payments $450 $450 $0
    Entertainment $200 $175 +$25
    Dining Out $150 $210 -$60

    Track your progress every month

    A budget isn’t something you create once and forget. Review it at the end of every month and compare your planned spending with your actual spending.

    This helps identify patterns and opportunities for improvement.

    • Did you overspend on restaurants?
    • Were groceries more expensive than expected?
    • Did you save as much as planned?
    • Which categories consistently stay under budget?
    • Can you increase your savings next month?

    Monthly review checklist

    • ✔ Update all expenses.
    • ✔ Compare budgeted vs. actual spending.
    • ✔ Adjust categories if needed.
    • ✔ Increase savings whenever possible.
    • ✔ Prepare next month’s budget before the month begins.

    Customize your budget template

    Your template should reflect your own lifestyle.

    For example, families with children may include:

    • Childcare
    • School expenses
    • Sports activities

    Business owners may need categories such as:

    • Business software
    • Marketing
    • Office supplies
    • Professional memberships

    The best budget template is the one you’ll actually use consistently.

    Common mistakes to avoid

    Making the template too complicated

    A budget with 40 categories often becomes difficult to maintain. Start simple and expand only when necessary.

    Forgetting irregular expenses

    Annual insurance premiums, holidays and vehicle maintenance should all be included in your planning.

    Never updating the template

    Your financial life changes. Your budget should change too.

    Ignoring savings

    Savings should never be whatever money is left over. Treat them like any other monthly bill.

    Digital or printable template?

    Digital Printable
    Easy to edit Simple to use
    Automatic calculations Helps build budgeting habits
    Cloud backup No software required
    Works across devices Easy to review with family

    Many people use both: a printable worksheet for planning and a spreadsheet or budgeting app for tracking actual spending.

    Related budgeting guides

    Bottom line

    A monthly budget template provides structure, clarity and confidence. Instead of wondering where your money disappeared, you’ll know exactly how every dollar was allocated before the month even begins.

    Keep your template simple, review it regularly and update it as your financial goals change. Over time, this habit can help you spend more intentionally, save more consistently and make smarter financial decisions.

    Frequently asked questions

    What is a monthly budget template?

    A monthly budget template is a worksheet that organizes your income, expenses, savings and financial goals into one easy-to-follow plan.

    Should I use a printable or digital template?

    Both are effective. Digital templates are easier to update, while printable versions provide a simple visual overview.

    How often should I update my budget?

    Review your budget every month and make adjustments whenever your income or expenses change.

    How many categories should a budget template include?

    Most households only need between 10 and 15 main categories.

    Can I use the same template every month?

    Yes. Most people reuse the same template while updating the numbers and adjusting categories as needed.

  • Biweekly budget: How to budget when you get paid every two weeks

    Biweekly budget: How to budget when you get paid every two weeks

    Getting paid every two weeks can feel confusing when most of your bills are due monthly. Some months you’ll receive two paychecks, while a few months each year you’ll receive three. Without a plan, it’s easy to overspend after payday and struggle before the next one arrives.

    A biweekly budget solves this problem by matching your spending plan to your pay schedule instead of the calendar month. It helps you cover monthly bills, save consistently and make every paycheck work harder.

    Whether you’re paid every other Friday, every other Thursday or another biweekly schedule, this guide will show you exactly how to build a budget that fits your income.

    Key takeaways

    • A biweekly budget follows your paycheck schedule instead of calendar months.
    • Most people receive 26 paychecks per year.
    • Two months each year usually include a third paycheck.
    • Planning around paydays makes bill payments much easier.
    • The extra paycheck can accelerate savings or debt repayment.

    What is a biweekly budget?

    A biweekly budget is a spending plan designed for people who receive a paycheck every two weeks.

    Instead of budgeting from the first day of the month until the last, you budget from one payday to the next.

    This approach aligns your income with your expenses and gives you a much clearer picture of available cash.

    How does a biweekly pay schedule work?

    Employees paid every two weeks receive:

    • 26 paychecks each year
    • Usually two paychecks per month
    • Two months with three paychecks

    This is different from employees paid twice per month, who receive exactly 24 paychecks annually.

    Pay schedule Paychecks per year
    Weekly 52
    Biweekly 26
    Twice monthly 24
    Monthly 12

    Knowing your exact pay schedule is the first step toward building an accurate budget.

    Why a biweekly budget works

    Many budgeting problems happen because expenses are organized monthly while income arrives every two weeks.

    A biweekly budget solves this mismatch by assigning every paycheck a specific purpose before you spend it.

    • Pay essential bills.
    • Fund savings.
    • Cover groceries.
    • Budget for transportation.
    • Set aside money for entertainment.

    This creates structure and reduces financial stress throughout the month.

    Pro tip

    Treat each paycheck as its own mini budget instead of waiting until the end of the month.

    Step 1: Calculate your average monthly income

    Because biweekly paychecks don’t line up perfectly with calendar months, start by calculating your average monthly income.

    Multiply one paycheck by 26 and divide the result by 12.

    This gives you a realistic monthly income for planning purposes.

    Example Amount
    Biweekly paycheck $2,000
    Annual income $52,000
    Average monthly income $4,333

    Step 2: List every monthly expense

    Write down every recurring expense.

    • Rent or mortgage
    • Utilities
    • Internet
    • Phone
    • Insurance
    • Loan payments
    • Subscriptions
    • Groceries
    • Transportation
    • Savings

    Separate fixed expenses from variable spending.

    This makes paycheck planning much easier.

    Step 3: Assign bills to each paycheck

    Instead of trying to pay every bill with every paycheck, divide expenses according to their due dates.

    For example:

    Paycheck 1 Paycheck 2
    Rent Utilities
    Groceries Insurance
    Transportation Credit card
    Savings Emergency fund

    Splitting expenses this way prevents one paycheck from carrying the entire month’s financial burden.

    Step 4: Plan for the third paycheck

    One of the biggest advantages of a biweekly budget is receiving an extra paycheck twice each year.

    Because your regular monthly expenses are already covered by the first two paychecks, this additional income creates an excellent opportunity to strengthen your finances.

    Rather than treating it as spending money, decide in advance how you’ll use it.

    • Boost your emergency fund.
    • Pay down high-interest debt.
    • Increase retirement contributions.
    • Build sinking funds.
    • Save for a vacation or major purchase.

    Planning ahead prevents this extra paycheck from disappearing on impulse purchases.

    Step 5: Create a paycheck-by-paycheck spending plan

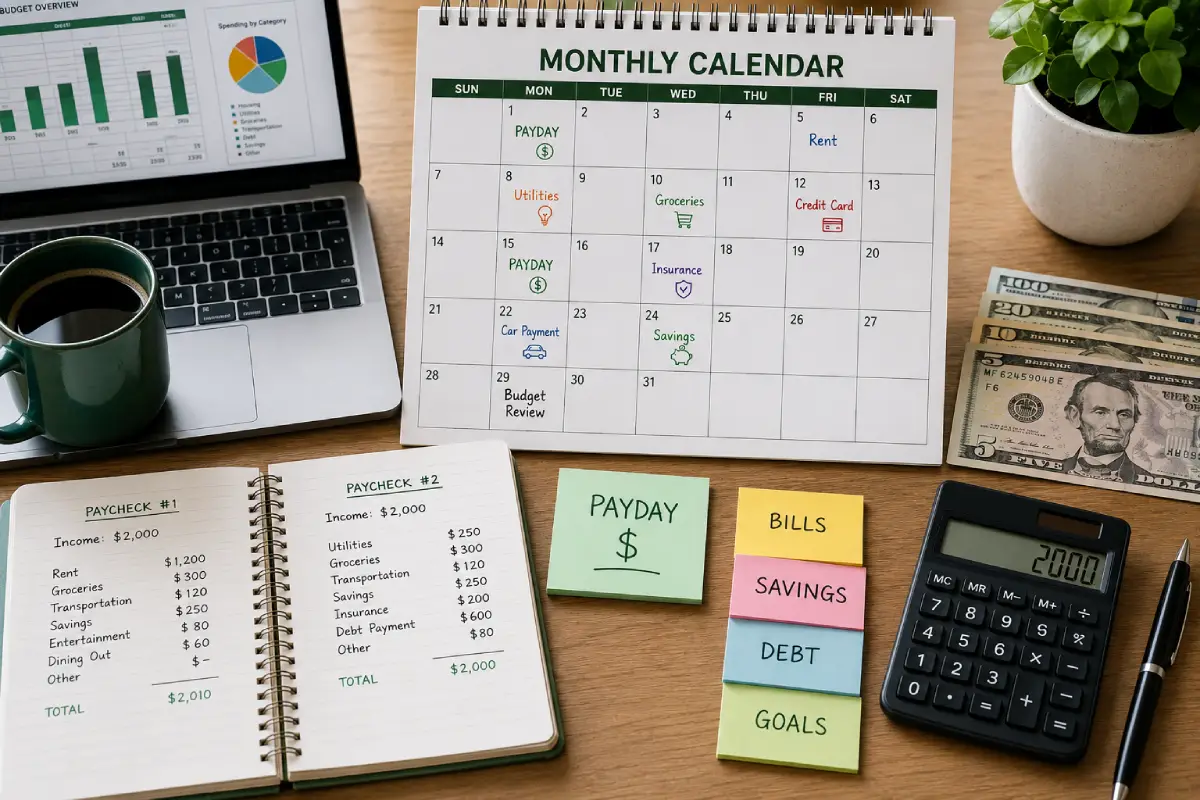
    The easiest way to stay organized is to give every paycheck a job before it arrives. This prevents impulse spending and ensures your most important expenses are always covered first.

    Start by listing your expected income, followed by essential bills, savings goals and flexible spending.

    Category Paycheck #1 Paycheck #2
    Housing $1,200
    Utilities $250
    Groceries $300 $300
    Transportation $120 $120
    Savings $250 $250
    Entertainment $80 $80
    Dining Out $60 $60

    This approach keeps both paychecks balanced and prevents one week from becoming financially overwhelming.

    Build a buffer between paychecks

    One of the biggest goals of a biweekly budget is creating breathing room.

    Instead of spending every dollar before your next payday, aim to leave a small cash buffer in your checking account.

    Even a few hundred dollars can prevent overdraft fees and reduce financial anxiety.

    Smart strategy

    Use the first extra paycheck each year to build your emergency fund. Use the second extra paycheck to pay off debt or invest.

    What if your bills don’t match your paydays?

    This is completely normal.

    The solution is simple:

    • Pay part of next month’s bills from the current paycheck.
    • Create sinking funds for irregular expenses.
    • Keep a small cash reserve in checking.
    • Automate recurring transfers after payday.

    Eventually your budget begins working ahead instead of catching up.

    Common mistakes people make

    Spending the first paycheck too quickly

    The excitement of payday often leads to unnecessary purchases. Plan every dollar before it reaches your account.

    Ignoring the third paycheck

    The two “extra” paychecks each year are one of the biggest financial advantages of a biweekly schedule. Don’t waste them.

    Not adjusting for irregular expenses

    Car repairs, holidays and annual insurance premiums should always appear in your budget.

    Never reviewing your plan

    Your budget should evolve as your income and expenses change.

    Who benefits most from a biweekly budget?

    • Employees paid every other Friday.
    • Healthcare workers.
    • Government employees.
    • Teachers.
    • Factory workers.
    • Anyone with predictable biweekly income.

    Related budgeting guides

    Bottom line

    A biweekly budget helps you organize your finances around the way you’re actually paid instead of forcing your income into a traditional monthly system. By planning each paycheck, assigning bills before spending and using extra paychecks strategically, you’ll reduce stress and gain far greater control over your money.

    The goal isn’t just surviving until your next payday—it’s building a financial system that allows every paycheck to move you closer to your long-term goals.

    Frequently asked questions

    How many paychecks do biweekly employees receive?

    Most people paid every two weeks receive 26 paychecks each year.

    How many months have three paychecks?

    Usually two months each year include a third paycheck, although this depends on your payroll calendar.

    Should I budget monthly or biweekly?

    If you’re paid every two weeks, budgeting by paycheck is often easier because it matches your actual cash flow.

    What should I do with my third paycheck?

    Prioritize emergency savings, debt repayment, retirement investing or sinking funds before increasing discretionary spending.

    Can I combine a biweekly budget with the 50/30/20 rule?

    Yes. Many people split each paycheck according to the 50/30/20 percentages while still planning around their biweekly pay schedule.

  • Budget calendar: How to plan your monthly finances like a pro

    Budget calendar: How to plan your monthly finances like a pro

    A budget is much easier to follow when you know exactly when money comes in and when it goes out. That’s where a budget calendar becomes one of the most valuable financial planning tools.

    Instead of reacting to bills as they arrive, a budget calendar helps you plan ahead, avoid late fees, reduce financial stress and make smarter decisions throughout the month.

    Whether you’re living paycheck to paycheck or simply want more control over your finances, creating a budget calendar takes less than an hour and can completely change how you manage your money.

    Key takeaways

    • A budget calendar shows income, bills and savings in one place.
    • Planning expenses before payday reduces financial stress.
    • Never miss due dates or late payment fees.
    • Review your calendar weekly instead of only at the end of the month.
    • Combine your calendar with a monthly budget for the best results.

    What is a budget calendar?

    A budget calendar is a monthly planning tool that combines your income, bills, savings goals and important financial dates into one easy-to-read schedule.

    Unlike a traditional budget spreadsheet that focuses only on numbers, a budget calendar focuses on timing.

    Knowing when money enters and leaves your account helps prevent overdrafts, missed payments and unnecessary stress.

    Think of it as a financial roadmap for the month ahead.

    Why a budget calendar works

    Many people know how much they earn and roughly how much they spend, but they still struggle financially because they don’t pay attention to timing.

    For example:

    • Your paycheck arrives on the 15th.
    • Your rent is due on the 16th.
    • Your credit card payment is due on the 18th.
    • Your car insurance renews on the 20th.

    If you aren’t planning ahead, it becomes easy to overspend during the first few days after payday.

    A budget calendar removes this uncertainty by showing every important financial event before it happens.

    Benefits of using a budget calendar

    • Pay bills on time.
    • Avoid late fees.
    • Reduce overdraft charges.
    • Plan savings automatically.
    • Improve cash flow.
    • Reduce financial anxiety.
    • Prepare for irregular expenses.

    Pro tip

    The best time to prepare your budget calendar is a few days before a new month begins—not after you’ve already started spending.

    What should be included in a budget calendar?

    Your calendar should include every important financial event.

    Include Examples
    Income Salary, freelance income, bonuses
    Bills Rent, utilities, subscriptions
    Debt payments Credit cards, personal loans
    Savings Emergency fund, investing
    Annual expenses Insurance, vehicle registration
    Financial reminders Monthly budget review

    The more complete your calendar is, the easier it becomes to stay organized.

    Step 1: Mark every payday

    Always begin with your income.

    Highlight every payday during the month.

    If you’re paid:

    • Weekly
    • Biweekly
    • Twice per month
    • Monthly
    • Irregularly

    Your calendar should clearly identify those dates.

    Everything else is planned around your income.

    Step 2: Add fixed bills

    Next, enter every recurring monthly expense.

    • Rent or mortgage
    • Electricity
    • Water
    • Internet
    • Phone
    • Streaming services
    • Insurance
    • Loan payments

    These are predictable expenses that rarely change.

    Adding them first makes planning much easier.

    Step 3: Schedule savings first

    One of the biggest mistakes people make is saving whatever money is left at the end of the month.

    Instead, schedule savings immediately after payday.

    This approach—often called Pay Yourself First—helps build consistency and prevents spending your savings before you’ve had a chance to set them aside.

    For example:

    • Payday: July 1
    • Emergency fund transfer: July 2
    • Investment contribution: July 2
    • Vacation fund: July 3

    Automating these transfers makes the process even easier.

    Step 4: Add irregular expenses

    Not every bill arrives every month.

    Your budget calendar should also include expenses such as:

    • Annual insurance premiums
    • Car maintenance
    • Holiday shopping
    • Birthdays
    • School supplies
    • Medical appointments
    • Property taxes

    Adding these dates early helps prevent unpleasant surprises later in the year.

    In the next section, we’ll build a complete monthly budget calendar, explain weekly reviews, show common mistakes to avoid and provide a practical template you can copy for your own finances.

    Step 5: Build your monthly budget calendar

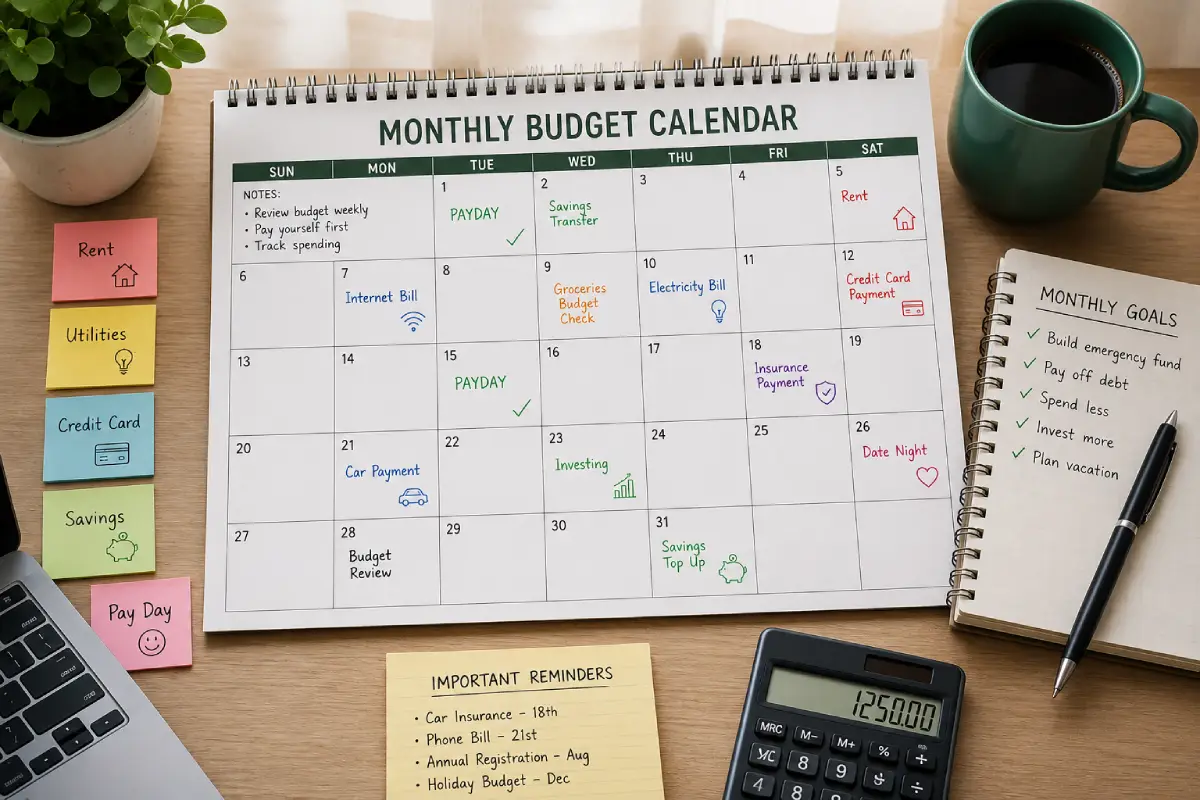
    Once you’ve added your income, recurring bills, savings contributions and irregular expenses, it’s time to put everything together into one monthly calendar.

    Your goal isn’t simply to know what you’ll spend—it’s to know exactly when you’ll spend it.

    Date Financial event Status
    1 Payday Income
    2 Emergency fund transfer Automatic
    3 Investment contribution Automatic
    5 Rent payment Due
    8 Internet bill Due
    10 Electricity bill Due
    12 Credit card payment Due
    15 Second paycheck Income
    18 Groceries Budget review
    22 Insurance payment Due
    28 Monthly budget review Review

    Review your calendar every week

    A budget calendar shouldn’t be something you only check at the beginning of the month.

    Spend five to ten minutes every week reviewing upcoming expenses.

    Ask yourself:

    • Are all bills covered?
    • Did any unexpected expenses appear?
    • Can I move money between categories?
    • Do I need to reduce discretionary spending?
    • Am I still on track with my savings goal?

    Weekly reviews make small adjustments before they become large financial problems.

    Smart habit

    Choose the same day every week—Sunday evening is popular—to review your calendar and prepare for the week ahead.

    Digital vs. paper budget calendars

    There isn’t a single correct way to manage a budget calendar.

    Digital calendar Paper planner
    Automatic reminders Easy to personalize
    Works on every device No technology required
    Easy recurring events Many people remember better when writing
    Simple updates Provides a visual overview

    Many people combine both—a digital calendar for reminders and a paper planner for monthly planning.

    Common mistakes to avoid

    Only writing down bills

    Your calendar should also include income, savings transfers and financial reviews.

    Ignoring annual expenses

    Insurance renewals, holiday shopping and vehicle registration should appear months before they’re due.

    Not updating the calendar

    Your financial situation changes throughout the year. Review and update your calendar regularly.

    Trying to remember everything

    The purpose of a budget calendar is to reduce mental stress—not increase it.

    Write everything down.

    Who should use a budget calendar?

    A budget calendar is useful for almost everyone, but it’s especially valuable if you:

    • Have multiple paychecks each month.
    • Live paycheck to paycheck.
    • Manage household finances.
    • Frequently forget bill due dates.
    • Want to improve your savings habits.
    • Have irregular income.

    Related budgeting guides

    Bottom line

    A budget calendar is one of the simplest financial tools you can create, yet it has a powerful impact on your day-to-day money management. By planning income, bills, savings and important financial dates in advance, you reduce stress and gain greater confidence in your financial decisions.

    Start with your paydays, schedule essential bills, automate savings and review your calendar every week. Over time, this simple habit can help you avoid late fees, improve cash flow and make budgeting feel much more manageable.

    Frequently asked questions

    What is the purpose of a budget calendar?

    A budget calendar helps you organize income, bills, savings and important financial dates so you always know what payments are coming next.

    Should I use a paper or digital budget calendar?

    Both work well. Digital calendars provide reminders, while paper planners offer a clear visual overview. Many people use both together.

    How often should I review my budget calendar?

    A quick weekly review and a more detailed monthly review are enough for most households.

    Can a budget calendar help me save money?

    Yes. Planning ahead helps prevent late fees, impulse spending and missed savings contributions.

    Is a budget calendar different from a monthly budget?

    Yes. A monthly budget focuses on how much you plan to spend, while a budget calendar focuses on when income and expenses occur throughout the month.

  • Budget categories explained: How to organize your monthly spending

    Budget categories explained: How to organize your monthly spending

    Creating a budget is one of the best ways to take control of your finances, but a budget is only as useful as the categories you build into it. Budget categories organize your income and expenses into meaningful groups, making it easier to understand where your money goes every month and where you can improve.

    Whether you’re budgeting for the first time or refining an existing financial plan, choosing the right categories can make the difference between a budget that works and one that quickly falls apart.

    This guide explains the most important budget categories, how to organize them, common mistakes to avoid and how to customize them for your own financial goals.

    Key takeaways

    • Budget categories divide your spending into organized groups.
    • Most households only need 10–15 primary categories.
    • Separate needs from wants to make better financial decisions.
    • Review your categories every month and adjust them as your life changes.
    • Your categories should reflect your own lifestyle—not someone else’s.

    What are budget categories?

    Budget categories are groups of expenses that help organize your monthly spending. Instead of seeing hundreds of individual transactions, categories summarize where your money is going.

    For example, rather than tracking every grocery receipt individually, all food purchased from supermarkets belongs in the Groceries category.

    Likewise, monthly rent, mortgage payments and property taxes belong under Housing.

    This organization makes spending patterns much easier to understand.

    Why budget categories matter

    Without categories, it’s difficult to know whether you’re spending too much or too little in any particular area.

    Imagine checking your bank account and simply seeing that you spent $4,200 this month. That number alone tells you almost nothing.

    Categories reveal the story behind the numbers.

    They answer questions such as:

    • Are housing costs becoming too expensive?
    • Are restaurant meals replacing grocery shopping?
    • Is entertainment taking money away from savings?
    • How much do you actually spend on transportation?
    • Could one category be reduced without affecting your quality of life?

    These insights help you make informed financial decisions instead of guessing.

    The difference between fixed and variable expenses

    Before creating categories, it helps to understand the difference between fixed and variable expenses.

    Fixed expenses Variable expenses
    Rent Groceries
    Mortgage Restaurants
    Insurance Entertainment
    Loan payments Shopping
    Internet Fuel
    Phone plan Travel

    Fixed expenses usually remain similar every month, while variable expenses change depending on your spending habits.

    Most budgeting improvements come from managing variable categories more effectively.

    Good to know

    Variable expenses are often the easiest place to find savings because they can usually be adjusted without changing your income.

    The essential budget categories every household should have

    Although every household is different, most budgets can be built around the same core categories.

    1. Housing

    Housing is usually the largest expense in any budget.

    This category may include:

    • Rent
    • Mortgage payments
    • Property taxes
    • HOA fees
    • Home maintenance
    • Repairs
    • Furniture replacement

    Financial planners generally recommend keeping housing costs below 30% of take-home income whenever possible.

    2. Utilities

    Utilities include the services needed to operate your home.

    • Electricity
    • Water
    • Gas
    • Internet
    • Mobile phone
    • Trash collection

    Although some utility bills fluctuate seasonally, grouping them together makes monthly planning easier.

    3. Groceries

    This category should include food purchased for home consumption.

    Many people mistakenly combine groceries with restaurants, making it difficult to see where money is actually going.

    Keeping them separate provides a much clearer picture.

    4. Transportation

    Your transportation category might include:

    • Gasoline
    • Public transportation
    • Vehicle maintenance
    • Parking
    • Tolls
    • Car registration
    • Ride-sharing services used for commuting

    If you own multiple vehicles, consider tracking maintenance separately.

    5. Insurance

    Insurance protects your finances against unexpected losses.

    Typical expenses include:

    • Health insurance
    • Auto insurance
    • Homeowners insurance
    • Renters insurance
    • Life insurance
    • Disability insurance

    Because many policies renew annually, it’s important to include them in your long-term budget planning.

    6. Debt payments

    This category includes all required debt obligations.

    • Credit cards
    • Student loans
    • Personal loans
    • Auto loans
    • Mortgage (if you prefer tracking separately from housing)

    Tracking debt payments separately makes it easier to measure progress toward becoming debt-free.

    7. Savings

    One of the biggest budgeting mistakes is treating savings as whatever remains at the end of the month.

    Instead, savings should become a mandatory category.

    Examples include:

    • Emergency fund
    • Vacation savings
    • Home down payment
    • Retirement investing
    • Sinking funds

    Pay yourself first before spending money elsewhere.

    Our guide to building an emergency fund explains why this category should always be funded first.

    8. Dining out

    Restaurants deserve their own category.

    Many households underestimate how much they spend on takeout, coffee and dining with friends.

    Keeping restaurants separate from groceries often reveals surprising spending patterns.

    9. Entertainment

    Entertainment covers the activities you enjoy outside of work and daily responsibilities. While this category isn’t essential for survival, it is important for maintaining a balanced lifestyle.

    Examples include:

    • Streaming services
    • Movie tickets
    • Sporting events
    • Concerts
    • Books
    • Video games
    • Hobbies

    If entertainment spending regularly exceeds your target, consider creating separate limits for subscriptions and leisure activities.

    10. Personal spending

    This category covers purchases made only for yourself.

    • Clothing
    • Shoes
    • Haircuts
    • Cosmetics
    • Gym memberships
    • Personal care products

    Separating personal spending from household expenses makes it easier to identify impulse purchases.

    11. Healthcare

    Healthcare expenses often vary throughout the year.

    This category may include:

    • Doctor visits
    • Prescription medications
    • Dental care
    • Vision care
    • Medical equipment
    • Co-payments

    Even if you have health insurance, budgeting for out-of-pocket medical costs is important.

    12. Children and education

    Families with children often benefit from a dedicated category.

    • School supplies
    • Childcare
    • Sports activities
    • Extracurricular lessons
    • School lunches
    • College savings

    13. Pets

    Pet owners should consider a separate category for recurring expenses.

    • Food
    • Veterinary care
    • Medication
    • Grooming
    • Toys
    • Pet insurance

    14. Gifts and holidays

    Birthdays, holidays and celebrations often surprise people—not because they are unexpected, but because they aren’t included in the monthly budget.

    Create a dedicated category and contribute a small amount every month.

    15. Travel

    If vacations are important to you, treat them like any other financial goal.

    Saving a small amount every month is much easier than trying to pay for an entire trip at once.

    Should you use sinking funds?

    Sinking funds are categories created for expenses that don’t occur every month but are guaranteed to happen eventually.

    Sinking fund Monthly contribution
    Christmas $50
    Car repairs $75
    Vacation $150
    Home maintenance $100
    Annual insurance $80

    Instead of scrambling when these expenses arrive, the money is already waiting.

    Pro tip

    Sinking funds are one of the biggest differences between people who constantly rely on credit cards and those who stay financially prepared.

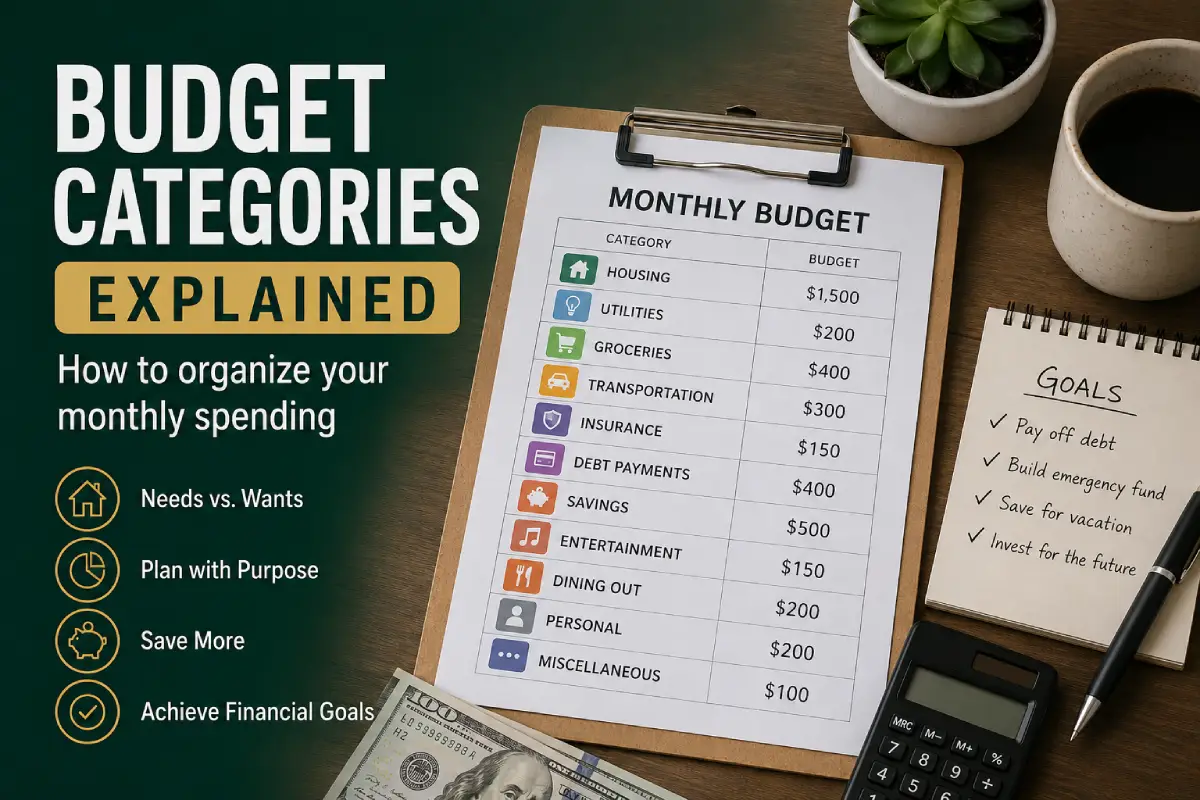
    Sample monthly budget categories

    Category Example allocation
    Housing 30%
    Utilities 7%
    Groceries 12%
    Transportation 10%
    Insurance 6%
    Debt payments 10%
    Savings 15%
    Entertainment 3%
    Dining out 3%
    Personal spending 4%

    These percentages are only examples. Every household should adjust them according to its own priorities.

    Common budgeting mistakes

    Using too many categories

    More categories don’t necessarily create a better budget. If your budget contains 40 different categories, maintaining it becomes exhausting.

    Ignoring irregular expenses

    Annual insurance premiums, vehicle registration and holiday shopping should never be surprises.

    Combining groceries with restaurants

    This is one of the most common budgeting mistakes. Keeping them separate gives you much better visibility into discretionary spending.

    Never reviewing your categories

    Your financial life changes over time. Categories should change as well.

    How often should you review your budget?

    A monthly review is ideal.

    During each review, ask yourself:

    • Which categories went over budget?
    • Which categories consistently have money left over?
    • Are there expenses that should become separate categories?
    • Can I increase my savings rate?
    • Do my categories still reflect my priorities?

    How budget categories fit with other budgeting methods

    Budget categories work with almost every budgeting system.

    Regardless of the budgeting method you choose, categories remain the foundation of your financial plan.

    Bottom line

    Budget categories transform a simple list of expenses into a practical financial roadmap. By grouping similar expenses together, you gain a clearer understanding of where your money goes and where improvements can be made.

    Start with the essential categories, keep the system simple and review it every month. As your financial situation evolves, your categories should evolve too.

    A good budget isn’t about restricting your life—it’s about giving every dollar a purpose so you can spend with confidence and save for the future.

    Frequently asked questions

    How many budget categories should I have?

    Most households only need between 10 and 15 primary categories.

    Should savings be treated as a category?

    Yes. Savings should be one of the first categories funded each month, not whatever money is left over.

    Can I create my own budget categories?

    Absolutely. Your budget should reflect your lifestyle, financial goals and spending habits.

    What category should emergency savings belong to?

    Emergency savings should have its own dedicated savings category to ensure it receives regular monthly contributions.

    How often should I change my categories?

    Review them every month and make adjustments whenever your income, expenses or financial priorities change.

    Should I budget for fun?

    Yes. A realistic budget includes room for entertainment and personal enjoyment. Budgets that eliminate all discretionary spending are often difficult to maintain over the long term.

  • Inflation finally cooled – but will Americans actually feel the difference?

    Inflation finally cooled – but will Americans actually feel the difference?

    The latest U.S. inflation report brought encouraging news for consumers. Prices fell 0.4% in June compared with May, marking the largest monthly decline since April 2020, while annual inflation slowed to 3.5%, well below economists’ expectations. Much of the improvement came from lower energy prices, especially gasoline, although inflation remains above the Federal Reserve’s long-term 2% target.

    Key numbers

    IndicatorPreviousLatest
    Monthly CPI+0.5%-0.4%
    Annual CPI4.2%3.5%
    Core CPI (YoY)2.9%2.6%
    Energy prices+3.9%-5.7%

    What happened?

    According to the U.S. Bureau of Labor Statistics, falling gasoline prices were the biggest reason inflation eased during June. Energy prices declined sharply, offsetting increases in several other categories. Core inflation—which excludes food and energy—was unchanged during the month and slowed to 2.6% annually, another sign that underlying price pressures have weakened.

    What does this mean for consumers?

    Lower inflation does not mean prices are returning to where they were a few years ago. It simply means prices are rising more slowly—or, in June’s case, declined slightly from the previous month.

    For households, this could mean:

    • Lower pressure on everyday expenses.
    • A reduced likelihood of another immediate Federal Reserve rate increase.
    • Better conditions for borrowers if interest rates eventually begin to decline.
    • Savings account rates could remain attractive while the Fed keeps policy restrictive.

    What happens next?

    Markets now expect the Federal Reserve to keep interest rates unchanged at its July meeting while monitoring future inflation data. However, analysts warn that higher oil prices caused by geopolitical tensions could quickly reverse part of June’s improvement.

    Bottom line

    June’s inflation report was one of the strongest signs in months that price pressures are easing. While consumers are unlikely to notice dramatic changes overnight, slower inflation improves the outlook for borrowing costs and overall financial conditions.

    The next major inflation report is scheduled for August 12, when investors and consumers will learn whether this cooling trend continues.

  • Cash stuffing explained: Does this budgeting trend actually work?

    Cash stuffing explained: Does this budgeting trend actually work?

    Cash stuffing is a budgeting method that divides money into physical envelopes or binder categories for specific expenses. Instead of using one bank balance for everything, you set aside cash for groceries, transportation, dining out, personal spending and other parts of your monthly plan.

    The method became highly visible on social media, where people record themselves organizing bills into labeled envelopes and savings challenges. But cash stuffing is not a new financial strategy. It is a modern version of the traditional envelope budgeting system.

    Cash stuffing can make spending limits easier to see and harder to ignore. However, it also has practical disadvantages, including the inconvenience and security risks of carrying cash.

    Key takeaways

    • Cash stuffing assigns physical cash to individual spending categories.
    • It is most useful for flexible expenses such as groceries, dining out and entertainment.
    • The method can reduce impulse spending by creating a visible limit.
    • Fixed bills, savings and online payments do not necessarily need physical envelopes.
    • You can use a hybrid system that combines cash envelopes with bank accounts and budgeting tools.

    What is cash stuffing?

    Cash stuffing is the practice of placing a planned amount of physical cash into labeled envelopes, pouches or sections of a budgeting binder.

    Each envelope represents a spending category. Common examples include:

    • Groceries
    • Gas
    • Dining out
    • Entertainment
    • Personal spending
    • Household supplies
    • Clothing
    • Gifts

    If the grocery envelope contains $500, you have $500 available for groceries during that budgeting period. Once the cash is gone, you either stop spending, wait until the next period or deliberately transfer money from another envelope.

    The physical separation prevents money intended for one purpose from being spent accidentally on something else.

    How does cash stuffing work?

    The basic process is straightforward, but it works best when it begins with a complete monthly budget.

    1. Calculate your take-home income

    Start with the amount of money that reaches your bank account after taxes, insurance premiums, retirement contributions and other payroll deductions.

    If your income changes each month, use a conservative estimate rather than your highest recent paycheck.

    People with limited or unpredictable income may also benefit from our guide on how to budget on a low income.

    2. Reserve money for fixed bills and financial goals

    Do not withdraw every dollar as cash. First reserve money for obligations that are normally paid electronically, including:

    • Rent or mortgage
    • Utilities
    • Insurance premiums
    • Loan payments
    • Phone and internet
    • Subscriptions you intend to keep
    • Emergency savings
    • Retirement contributions

    Cash stuffing is primarily intended to control flexible spending, not replace every part of your financial system.

    3. Select your cash categories

    Choose the categories where you are most likely to overspend or where a clear limit would improve your decisions.

    A beginner may start with five categories:

    Cash envelope Monthly amount
    Groceries $500
    Gas $250
    Dining out $150
    Entertainment $100
    Personal spending $100
    Total cash needed $1,100

    It is usually easier to maintain five to eight useful categories than 20 highly specific envelopes.

    4. Set realistic limits

    Review recent bank and credit card statements before deciding how much each envelope should receive.

    If your household normally spends $700 on groceries, starting with a $350 grocery envelope is unlikely to be sustainable. A more realistic first target may be $625, followed by gradual reductions.

    Use the Fintayo Budget Calculator to compare your income with needs, wants, savings and debt payments before setting limits.

    5. Withdraw and organize the cash

    Withdraw the total amount needed for your chosen categories. Divide the bills among labeled envelopes or binder sections.

    You may use:

    • Standard paper envelopes
    • A reusable budgeting binder
    • Zipper pouches
    • A wallet with several compartments
    • A lockable cash organizer stored at home

    A decorative binder may make the process more enjoyable, but expensive budgeting supplies are not necessary. The system can work with ordinary envelopes and handwritten labels.

    6. Spend only from the appropriate category

    Use grocery cash only for groceries and entertainment cash only for entertainment.

    When one envelope runs low, the reduced balance provides an immediate signal to slow down.

    7. Record spending when necessary

    You can see the remaining cash directly, but a transaction log may help when:

    • Several household members use the same envelope
    • You want to compare prices or spending patterns
    • You occasionally use a card and reimburse the category later
    • You need a detailed record for the next month’s plan

    8. Review the results at the end of the month

    Ask which envelopes were empty too early, consistently overfunded, frequently used for transfers or too specific to be useful.

    Use the results to adjust next month’s amounts. Budgeting works best as a repeated review process, not a one-time setup.

    A complete cash stuffing example

    Assume monthly take-home income is $4,500.

    First, the household reserves money for fixed bills, debt and savings:

    Fixed expense or goal Monthly amount
    Rent $1,500
    Utilities $260
    Insurance $280
    Minimum debt payments $300
    Phone and internet $180
    Savings $500
    Total fixed bills and goals $3,020

    This leaves $1,480 for variable expenses and limited discretionary spending.

    Cash category Amount
    Groceries $600
    Transportation $300
    Dining out $180
    Entertainment $120
    Personal spending $120
    Household supplies $100
    Clothing $60
    Total cash categories $1,480

    Every dollar of the $4,500 income has a purpose. This makes cash stuffing compatible with zero-based budgeting.

    What happens when an envelope is empty?

    The most important moment in cash stuffing occurs when a category reaches zero.

    Option 1: Stop spending

    This is the strictest approach. If the dining-out envelope is empty, you stop eating at restaurants until the next budgeting period.

    Option 2: Transfer money from another envelope

    You may move money from entertainment to groceries if the grocery category was underestimated.

    The transfer should be intentional. Moving $50 into groceries means accepting $50 less for entertainment.

    Option 3: Adjust the next budget

    If a category repeatedly runs out despite reasonable spending, the planned amount may be too low.

    Increase that envelope and reduce another category, or look for a realistic way to reduce the underlying cost.

    Important

    Moving money between envelopes is not failure. It becomes a problem only when transfers are frequent, automatic and disconnected from your priorities.

    Which expenses work best for cash stuffing?

    Cash stuffing works best for flexible categories that are easy to overspend.

    • Groceries
    • Dining out
    • Entertainment
    • Clothing
    • Personal spending
    • Beauty and self-care
    • Household supplies
    • Children’s activities

    Which expenses are less suitable for cash?

    Some expenses are easier and safer to manage electronically:

    • Rent or mortgage
    • Utilities paid by automatic withdrawal
    • Insurance premiums
    • Online subscriptions
    • Loan payments
    • Retirement contributions
    • Emergency savings

    You can still treat them as categories in the budget without withdrawing the money.

    Cash stuffing vs. envelope budgeting

    Cash stuffing and envelope budgeting use the same core idea: assign money to specific categories before spending it.

    The main difference is terminology and presentation. Envelope budgeting is the broader method. Cash stuffing usually refers to physically organizing bills in labeled envelopes or a binder.

    Digital envelope systems are still envelope budgeting, but they are not technically cash stuffing because no physical cash is used.

    Cash stuffing vs. zero-based budgeting

    Zero-based budgeting gives every dollar of income a purpose, including bills, savings, debt payments and spending categories.

    Cash stuffing focuses on the physical handling of flexible spending money.

    The two methods can work together:

    1. Create a zero-based monthly plan.
    2. Reserve money for fixed bills, savings and debt payments.
    3. Withdraw the amount assigned to flexible categories.
    4. Place that cash into envelopes.

    Cash stuffing vs. the 50/30/20 rule

    The 50/30/20 rule divides take-home income into broad groups:

    • 50% for needs
    • 30% for wants
    • 20% for savings and additional debt payments

    Cash stuffing creates detailed limits inside those broad groups. For example, the wants category could be divided into dining, entertainment, shopping and personal spending envelopes.

    Advantages of cash stuffing

    It makes spending limits visible

    You can see exactly how much remains in each category without reviewing a spreadsheet or app.

    It can reduce impulse spending

    Physical cash creates friction. Handing over bills may feel more deliberate than tapping a card.

    It separates spending categories

    Money intended for groceries is less likely to be spent on entertainment when it is physically separated.

    It provides immediate feedback

    A nearly empty envelope shows that spending must slow down before the month ends.

    It can help people who dislike apps

    The method does not require account syncing, software subscriptions or complex dashboards.

    Disadvantages of cash stuffing

    Cash can be lost or stolen

    Physical money usually does not have the same protections as funds stored in a bank account.

    It is inconvenient for online purchases

    Many bills and purchases require electronic payments, which can make a cash-only system impractical.

    It requires regular preparation

    You must withdraw cash, organize envelopes and track reimbursements when card purchases occur.

    It may complicate rewards and consumer protections

    Using cash means giving up credit card rewards and some purchase protections. Rewards are valuable only when balances are paid in full and spending remains controlled.

    It does not solve insufficient income

    Cash stuffing can control allocation, but it cannot make an income shortfall disappear.

    Is cash stuffing safe?

    The method can be used safely, but storing significant amounts of cash at home creates risk.

    Consider these precautions:

    • Carry only the amount needed for current spending.
    • Store remaining envelopes in a secure location.
    • Do not display personal addresses or private information in social media videos.
    • Avoid showing large amounts of cash publicly.
    • Keep emergency savings in an insured bank account rather than at home.
    • Use electronic payment methods for large or remote transactions.

    Can you cash stuff when most purchases are online?

    Yes, but you need a reimbursement process.

    One method is:

    1. Make the online purchase with a debit or credit card.
    2. Remove the same amount from the appropriate cash envelope.
    3. Deposit the cash back into your checking account or keep it in a separate “card reimbursement” envelope.
    4. Pay the card balance using the reserved money.

    This keeps the category limit accurate, but it requires discipline. A digital budgeting app may be easier if most purchases are electronic.

    Our guide to the best budgeting apps compares several alternatives.

    What should you do with leftover cash?

    Choose a rule before the end of the month. Common options include:

    • Roll the money into next month’s envelope.
    • Move it to emergency savings.
    • Add it to a sinking fund.
    • Make an extra debt payment.
    • Invest it according to your financial plan.
    • Use part of it as a small reward.

    Rolling every surplus forward can create flexibility in expensive months. Sweeping the money into savings may create faster progress toward financial goals.

    Cash stuffing for savings goals

    Some people use cash binders for sinking funds and short-term goals such as:

    • Holiday spending
    • Vacations
    • Car maintenance
    • School expenses
    • Home repairs
    • Annual insurance premiums

    Physical cash can make progress visible, but large balances are generally safer in an insured savings account.

    You can track progress with the Fintayo Monthly Budget Planner while keeping the actual savings in the bank.

    Common cash stuffing mistakes

    Withdrawing too much cash

    Not every category needs a physical envelope. Keep fixed bills and long-term savings in appropriate accounts.

    Using unrealistic limits

    Review actual spending before reducing a category. A plan that is impossible to follow will not last.

    Buying expensive budgeting supplies

    A binder can be useful, but purchasing elaborate accessories can undermine the purpose of controlling spending.

    Creating too many envelopes

    Start with the categories that cause the most problems. Add detail only when it improves decisions.

    Ignoring card purchases

    If a purchase is charged to a card, reduce the corresponding envelope immediately so the category balance remains accurate.

    Treating every transfer as failure

    Budgets need flexibility. The important issue is whether transfers are deliberate and consistent with your priorities.

    Who should consider cash stuffing?

    The method may work well for people who:

    • Frequently overspend variable categories
    • Prefer visual and hands-on budgeting
    • Want to reduce card use
    • Are new to budgeting
    • Need clear limits for discretionary spending
    • Enjoy maintaining a physical planner

    Who may prefer another method?

    A different approach may be better if you:

    • Make nearly all purchases online
    • Travel frequently
    • Do not feel comfortable carrying cash
    • Want automatic transaction syncing
    • Need detailed net-worth or investment tracking
    • Already control spending effectively with a simpler system

    How to start cash stuffing in one weekend

    1. Review one to three months of spending.
    2. Create a complete monthly budget.
    3. Select five flexible categories.
    4. Set realistic limits for each category.
    5. Withdraw only the total needed for those envelopes.
    6. Label simple envelopes or binder sections.
    7. Track spending for one month.
    8. Adjust the amounts based on actual results.

    Do not aim for a perfect system during the first month. Start small and make the process easier to maintain.

    Does cash stuffing actually work?

    Cash stuffing can work when the main financial problem is uncontrolled flexible spending. The physical limits create immediate feedback and make tradeoffs more visible.

    It is less useful when the main problem is high fixed expenses, insufficient income, expensive debt or irregular cash flow. In those cases, cash envelopes may help at the margins but will not address the underlying issue.

    The method works best when it is part of a complete budget that includes:

    • Fixed bills
    • Emergency savings
    • Debt payments
    • Irregular expenses
    • Long-term financial goals

    Bottom line

    Cash stuffing is a practical way to create visible spending limits by placing money into physical categories. It can reduce impulse purchases, simplify discretionary spending and help people who prefer a hands-on approach.

    However, you do not need to use cash for every expense. A hybrid system is often more practical: pay fixed bills electronically, keep savings in the bank and use cash only for categories where spending tends to get out of control.

    Start with a few realistic envelopes, review the results after one month and adjust the method to fit your life. The goal is not to create a visually perfect binder. The goal is to make better spending decisions before the money is gone.

    Frequently asked questions

    Is cash stuffing the same as envelope budgeting?

    Cash stuffing is a physical form of envelope budgeting. Envelope budgeting can also be done digitally through apps, spreadsheets or bank subaccounts.

    How much money should I use for cash stuffing?

    Use only the amount assigned to selected flexible spending categories. Fixed bills and long-term savings generally do not need to be withdrawn.

    What categories should beginners use?

    Groceries, gas, dining out, entertainment and personal spending are common starting categories because they are flexible and frequently overspent.

    Can cash stuffing help you save money?

    It can help by limiting discretionary spending and making leftover money easier to redirect toward savings or debt.

    Is it safe to keep cash at home?

    Small working amounts may be practical, but large emergency funds and long-term savings are generally safer in an insured bank account.

    Can I use cash stuffing with a credit card?

    Yes, but each card purchase should immediately reduce the corresponding envelope. Reserve that cash to pay the credit card balance.

    What if I run out of cash before the month ends?

    Stop spending, transfer money from another category or revise the next month’s limit. Make the tradeoff deliberately rather than ignoring it.

    Do I need a special cash stuffing binder?

    No. Ordinary envelopes, labels and a simple notebook are enough to start.

  • Envelope budgeting explained: How the cash envelope system works

    Envelope budgeting explained: How the cash envelope system works

    Envelope budgeting is a hands-on money management method that divides your available spending money into separate categories, or “envelopes.” Each envelope has a specific purpose, such as groceries, transportation, entertainment or personal spending.

    The traditional version uses physical cash and paper envelopes. Modern versions can use bank subaccounts, prepaid cards, spreadsheets or digital envelope budgeting apps.

    The basic rule is simple: once the money in an envelope is gone, spending in that category stops until the next budgeting period.

    Key takeaways

    • Envelope budgeting assigns a fixed amount of money to individual spending categories.
    • The method works best for flexible expenses such as groceries, dining out and entertainment.
    • You can use physical cash or digital “envelopes” in an app or bank account.
    • When one envelope is empty, you either stop spending or deliberately move money from another category.
    • The system can reduce overspending, but it requires regular tracking and realistic category limits.

    What is envelope budgeting?

    Envelope budgeting is a category-based spending system. At the start of a budgeting period, you decide how much money each category can receive.

    For example, a monthly plan may include:

    Envelope Monthly amount
    Groceries $500
    Gas and transportation $250
    Dining out $150
    Entertainment $100
    Personal spending $100
    Household supplies $100

    If the grocery envelope contains $500, that is the total amount available for groceries during the month.

    When the balance reaches zero, you have three options:

    • Stop spending in that category
    • Wait until the next budgeting period
    • Move money from another envelope and accept the tradeoff

    The method makes spending limits visible. Instead of checking only whether there is money in your bank account, you check whether money is still available for that specific purpose.

    How does the cash envelope system work?

    The traditional cash envelope system follows a straightforward process.

    1. Calculate your available income

    Start with monthly take-home income, not gross income. Include only money that is reasonably expected to arrive during the budgeting period.

    If income varies, use a conservative estimate. Our guide on budgeting on a low income explains how to plan when financial margins are limited.

    2. Pay fixed bills first

    Envelope budgeting is usually most useful for flexible expenses. Fixed bills such as rent, insurance, loan payments and internet service can remain in your bank account and be paid electronically.

    Before filling spending envelopes, reserve money for:

    • Housing
    • Utilities
    • Insurance
    • Minimum debt payments
    • Subscriptions you intend to keep
    • Savings contributions

    3. Choose your envelope categories

    Select categories where spending tends to vary or where you often exceed your intended limit.

    Common envelope categories include:

    • Groceries
    • Dining out
    • Gas
    • Entertainment
    • Clothing
    • Personal spending
    • Household supplies
    • Children’s activities
    • Gifts

    Do not create too many envelopes at the beginning. Five to eight categories are usually easier to maintain than 20 highly specific categories.

    4. Set a spending limit for each envelope

    Use recent spending history to create realistic limits.

    If you usually spend $650 on groceries, setting the first grocery envelope at $350 is unlikely to work. A more practical starting point may be $575 or $600, followed by gradual adjustments.

    The Fintayo Budget Calculator can help you compare income, needs, wants and financial goals before setting category limits.

    5. Fill the envelopes

    Withdraw the total amount of cash needed for the selected categories and place the money into labeled envelopes.

    For example:

    • $500 in Groceries
    • $250 in Transportation
    • $150 in Dining Out
    • $100 in Entertainment
    • $100 in Personal Spending

    You do not need to use cash for every category. Fixed bills and online purchases can still be handled digitally.

    6. Spend only from the correct envelope

    When buying groceries, use money from the grocery envelope. When paying for a movie, use the entertainment envelope.

    This separation prevents one category from quietly consuming money intended for another purpose.

    7. Track what remains

    The cash balance provides a visual spending signal. If only $60 remains in the grocery envelope halfway through the month, you know that spending must slow down.

    You can also record each transaction in a notebook, spreadsheet or budgeting app.

    8. Review the envelopes at the end of the month

    Compare planned spending with actual spending and ask:

    • Which envelopes were empty too early?
    • Which categories had money left?
    • Were the limits realistic?
    • Did you move money between envelopes?
    • Which spending decisions caused problems?

    Use the answers to adjust the next month’s plan.

    Envelope budgeting example

    Assume monthly take-home income is $4,000.

    Fixed expenses and financial goals total $2,700:

    Fixed category Amount
    Rent $1,400
    Utilities $250
    Insurance $250
    Minimum debt payments $250
    Savings $350
    Phone and internet $200
    Total fixed expenses and goals $2,700

    This leaves $1,300 for flexible spending.

    Envelope Amount
    Groceries $550
    Transportation $300
    Dining out $150
    Entertainment $100
    Personal spending $100
    Household supplies $100
    Total envelope spending $1,300

    Every dollar has a defined purpose. This makes envelope budgeting closely related to zero-based budgeting.

    What happens when an envelope is empty?

    An empty envelope is not automatically a crisis. It is information.

    You can respond in one of three ways.

    Stop spending

    This is the strictest version of the system. If the dining-out envelope is empty, no more restaurant spending occurs until the next month.

    Move money from another envelope

    You may decide that groceries are more important than entertainment and transfer $40 from one envelope to another.

    The transfer should be deliberate. The method loses value if you repeatedly move money without acknowledging what is being sacrificed.

    Adjust next month’s limit

    If an envelope is consistently too small, the original estimate may be unrealistic.

    Increase the category and reduce another category, or look for ways to lower the underlying expense.

    Important

    Moving money between envelopes is not failure. It becomes a problem only when transfers are automatic, frequent and disconnected from your priorities.

    Which expenses work best with envelopes?

    Envelope budgeting works best for categories that are flexible and frequently overspent.

    Good candidates include:

    • Groceries
    • Dining out
    • Entertainment
    • Clothing
    • Personal spending
    • Beauty and self-care
    • Household supplies
    • Children’s activities

    These expenses benefit from a clear upper limit and immediate feedback.

    Which expenses are less suitable for cash envelopes?

    Some categories are easier to manage electronically:

    • Rent or mortgage
    • Utilities paid by automatic withdrawal
    • Insurance premiums
    • Online subscriptions
    • Loan payments
    • Retirement contributions
    • Emergency savings

    You can still treat them as budget categories, but physical cash is usually unnecessary.

    Digital envelope budgeting

    You do not have to carry cash to use the envelope method.

    Digital alternatives include:

    • Budgeting apps with category balances
    • Bank accounts with virtual subaccounts
    • Separate checking accounts
    • Prepaid cards for specific spending categories
    • Spreadsheets that track remaining category balances

    Apps such as Goodbudget are specifically designed around digital envelope budgeting. Other apps allow users to create custom categories that function in a similar way.

    Our comparison of the best budgeting apps explains which tools may fit different budgeting styles.

    Cash envelopes vs. digital envelopes

    Feature Cash envelopes Digital envelopes
    Visibility Highly visual and tangible Depends on the app or account
    Convenience Less convenient for online purchases Works well for electronic spending
    Tracking Often manual May be automatic
    Overspending control Strong physical limit Requires checking category balances
    Security Cash can be lost or stolen Protected by account security features
    Shared household use Requires coordinating physical cash Some apps support shared access

    A hybrid system can combine the strengths of both methods. You might use cash for dining and personal spending while managing groceries and transportation digitally.

    Advantages of envelope budgeting

    It creates clear spending limits

    Each category has a visible amount. This makes it harder to confuse the total bank balance with money that is actually available to spend.

    It can reduce impulse purchases

    Cash creates friction. Handing over physical money may feel more deliberate than tapping a card.

    It provides immediate feedback

    You can see when a category is running low before the end of the month.

    It supports intentional tradeoffs

    Moving money between envelopes forces you to decide which priority matters more.

    It can simplify flexible spending

    Instead of tracking every small purchase against the full household budget, you only need to monitor the remaining envelope balance.

    Disadvantages of envelope budgeting

    Cash can be inconvenient

    Many purchases are made online, through apps or with cards. A cash-only system may not fit modern spending habits.

    Cash can be lost or stolen

    Money in a physical envelope usually does not have the same protections as funds in a bank account.

    It requires preparation

    You must choose categories, establish limits, withdraw cash and maintain the envelopes.

    It can become too rigid

    Unexpected needs may require transfers between envelopes. A system that treats every adjustment as failure can become discouraging.

    It does not solve an income shortfall

    Envelope budgeting controls allocation, but it cannot make insufficient income cover expenses that exceed it.

    Envelope budgeting vs. zero-based budgeting

    The two methods are closely related but not identical.

    Zero-based budgeting gives every dollar of income a purpose, including fixed bills, savings, debt payments and flexible spending.

    Envelope budgeting focuses on separating money into category-specific limits, particularly for spending categories.

    You can use both systems together:

    1. Create a zero-based monthly plan.
    2. Assign money to all bills, savings and goals.
    3. Place flexible spending amounts into envelopes.

    This combination creates both a complete financial plan and practical day-to-day spending limits.

    Envelope budgeting vs. the 50/30/20 rule

    The 50/30/20 rule divides take-home income into broad groups:

    • 50% for needs
    • 30% for wants
    • 20% for savings and additional debt payments

    Envelope budgeting creates more detailed category limits.

    For example, the 30% “wants” category could be divided into separate envelopes for dining, entertainment, shopping and personal spending.

    The 50/30/20 rule helps establish broad allocation targets. Envelope budgeting helps control spending inside those targets.

    How to start envelope budgeting without using cash

    1. List monthly take-home income.
    2. Subtract fixed bills, savings and required debt payments.
    3. Select five to eight flexible categories.
    4. Set a monthly limit for each category.
    5. Create a separate digital balance for every category.
    6. Update the balance after each purchase.
    7. Review remaining amounts once or twice per week.

    The Fintayo Monthly Budget Planner can help you compare planned spending with actual spending during the month.

    Common envelope budgeting mistakes

    Creating too many envelopes

    Do not create separate envelopes for every possible purchase. Too many categories make the system difficult to maintain.

    Setting unrealistic limits

    A category should be challenging enough to improve spending but realistic enough to follow.

    Ignoring irregular expenses

    Annual fees, holidays and car repairs should be handled through sinking funds or separate savings categories.

    Borrowing repeatedly from other envelopes

    Occasional transfers are normal. Constant transfers suggest that category limits or priorities need revision.

    Using envelopes without a complete budget

    Envelope budgeting should be part of a broader spending plan that includes fixed bills, savings and debt payments.

    Who should consider envelope budgeting?

    The method may work well for people who:

    • Frequently overspend discretionary categories
    • Want a visual and tangible spending system
    • Prefer clear category limits
    • Are new to budgeting
    • Want to reduce credit card use
    • Share spending decisions with a partner

    Who may prefer another method?

    Another method may be better if you:

    • Make almost all purchases online
    • Prefer automatic transaction tracking
    • Travel frequently and do not want to carry cash
    • Need detailed investment or net-worth tracking
    • Already control spending effectively with a simpler budget

    Bottom line

    Envelope budgeting creates specific spending limits by separating money into categories. The traditional version uses cash, but the same principles can be applied through apps, bank subaccounts or spreadsheets.

    The method is especially useful for variable expenses such as groceries, dining out, entertainment and personal spending.

    Start with a small number of categories, set realistic limits and review the results at the end of the month. If physical cash feels inconvenient, use digital envelopes or a hybrid approach.

    The goal is not to follow the method perfectly. The goal is to make spending decisions visible before the money is gone.

    Frequently asked questions

    Does envelope budgeting require cash?

    No. You can use budgeting apps, bank subaccounts, spreadsheets or separate card balances to create digital envelopes.

    What should I do with money left in an envelope?

    You can roll it into the next month, move it to savings, add it to a sinking fund or apply it toward debt. Decide on a rule before the month ends.

    How many budget envelopes should I have?

    Beginners may find five to eight flexible spending categories manageable. Add more only when the extra detail improves decisions.

    Is envelope budgeting the same as cash stuffing?

    Cash stuffing is a modern name for physically placing cash into labeled categories. It is one form of envelope budgeting.

    Can envelope budgeting help pay off debt?

    It can help control flexible spending and free money for additional debt payments. Required payments and extra debt contributions should remain part of the overall monthly budget.

    What happens if I spend more than an envelope contains?

    You must stop spending, move money from another envelope or revise the category limit. The important step is to make the tradeoff consciously.